Get started with Cinemask Pro
I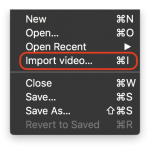 mporting a video is easy! From the File menu select Import video and select any video file to proceed.
You may also drag a video file into the Cinemask Pro dock icon, or drag and drop a file into the work area to perform the same action.
You will see a importing progress bar once the process has begun.
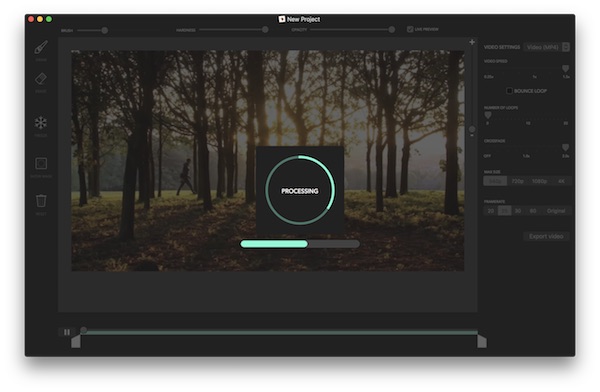
Note: Assets with a lengthy duration can take a long time to process, due to the nature of encoding required to make video files compatible. This process only needs to happen once, after you have saved your project it will never happen again.
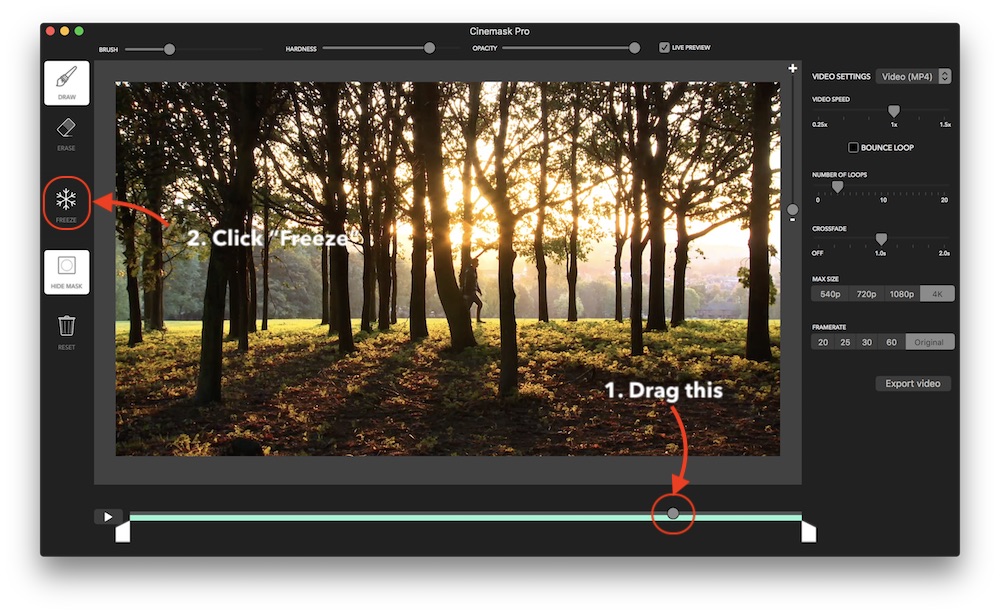
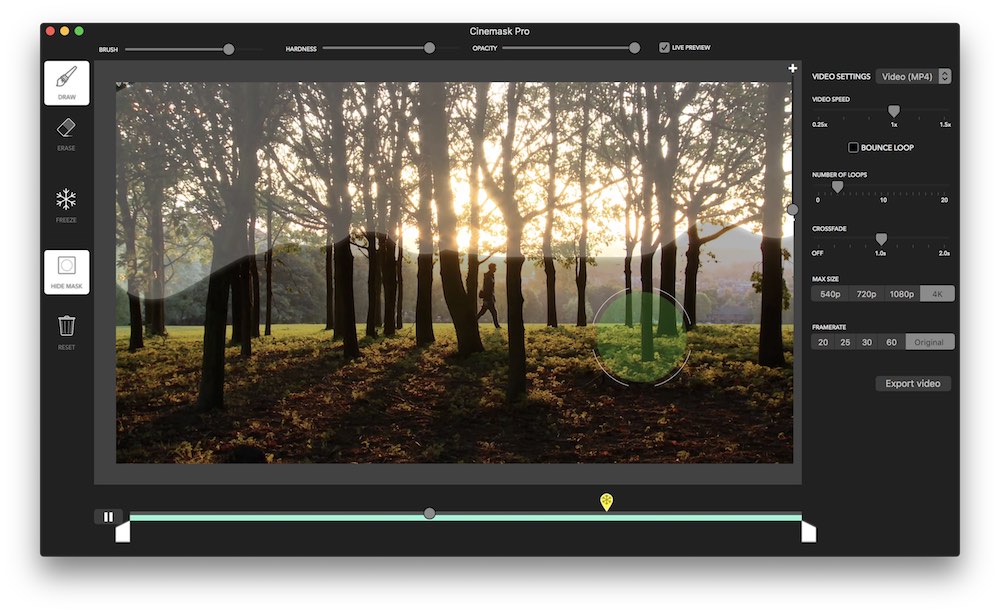
The “freeze frame” refers to the reference frame that remains static, while the selected area of the video animates.
You will likely want to select your freeze frame first and foremost. To do this simply drag the video slider on the bottom to the point in the video you wish to freeze, and then click the “freeze” button on the left toolbar.
For more control use the left and right arrow keys to move frame by frame.
 Once completed successfully you will see a marker appear at the location of the freeze frame. If you play the video at this point it will appear static until you Draw an area to animate.
You will want to trim your cinemagraph by setting the start and end point on the original video. To do this, simply drag the two handles below the video.
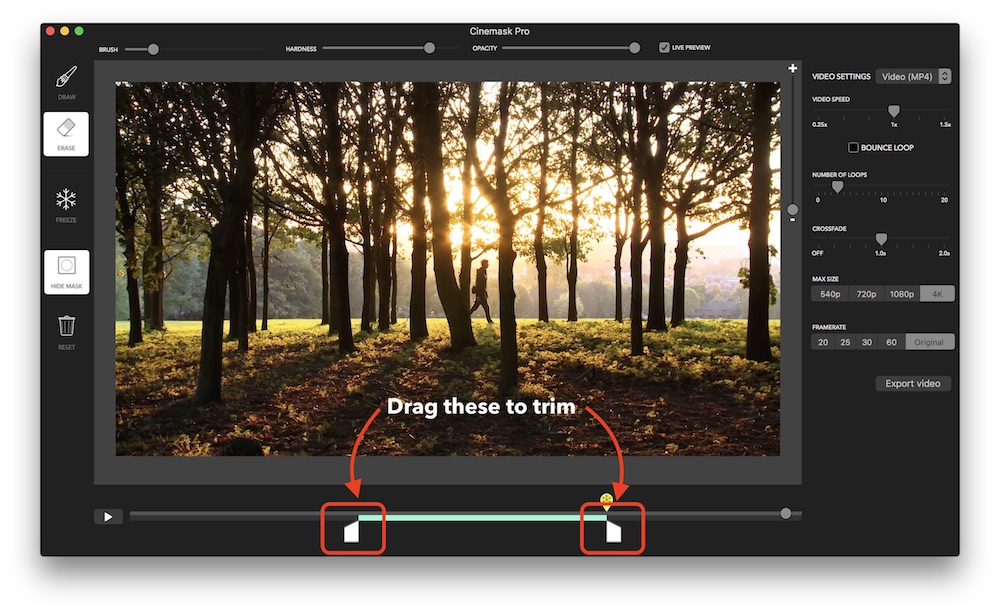
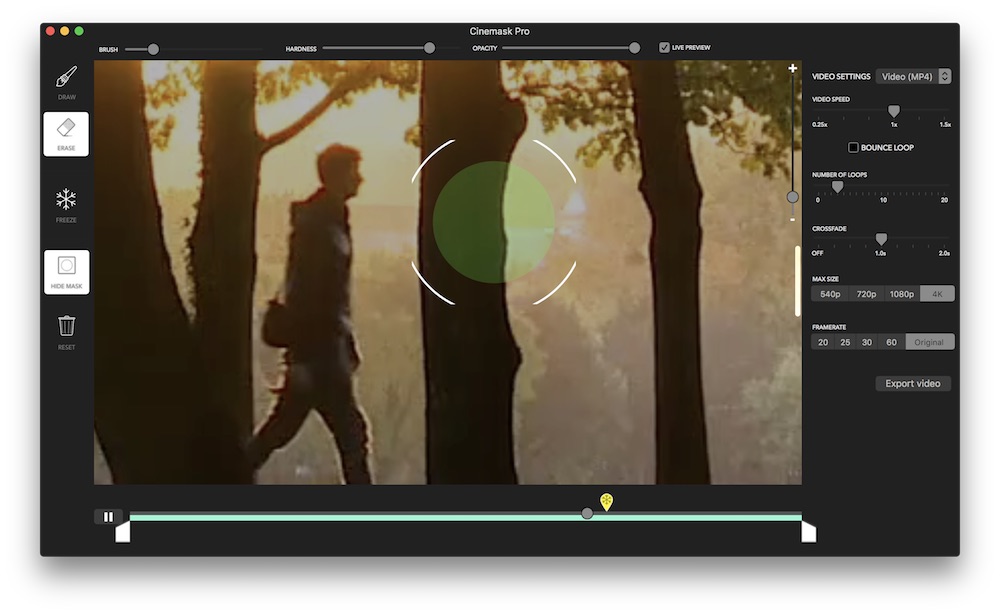
In Cinemask Pro when you are “drawing” you are painting an area of the video you wish to animate. When you “erasing” you are removing an animated area.
Simply click the “Draw” or “Erase” tools from the sidebar and click and drag on your video. If the video is playing you will see a live preview of the animated area come to life.
Click on the “Hide Mask” button to toggle display of your drawn area on and off.
If using a two-button mouse you may also right click to erase.
You will likely need to zoom in to gain more control over the animated area of your cinemagraph. To do this either:
- Press alt/option and use the mouse wheel
- Use two-finger pinch to zoom on your trackpad
- Use the zoom slider on the right side of your video
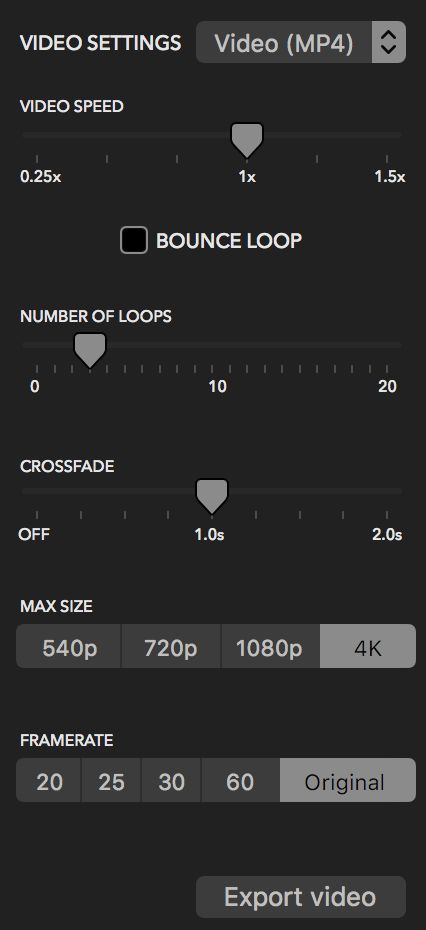
You may export your creation as either a video (MP4) or a GIF. GIFs will naturally loop infinitely and seamlessly, whereas you may need to specify the number of loops you want to apply to a video. This is because videos do not always naturally loop (e.g on Instagram, Facebook, Twitter, etc) so you will want to make sure your creation has enough loops to be effective.
Simply select a max size (will adjust video resolution) and framerate and click on the “export video” button. Once you provide a filename the export process will begin.